Showing posts with label game props. Show all posts

Thursday, April 15, 2010

TF2 and WoW wips..

Working on a bunch of projects in between commissions and such, and these puppies have been slowly making progress.


TF2- Intel case-


Here's a couple of photos of a TF2 intel case that I'm working on. This is for a commission, so it taking priority XD

Will be adding buttons and faux dials and such. The panel is made of Sintra.

5 minutes with a router became a full day with rasps & a surform, since I don't have a aforemetioned router :p

Turning the intel box into an intel case, by cutting it apart with a tablesaw


WoW- Sister Benedron cosplay

I never played World of Warcraft, but I saw a figure of Sister Benedron at a comic shop, and loved the design.. large axe & book of smackdown, lots' o' armor, and coincidentally, a white hood, which seems to be a common element in all the personal costumes I've made to date.. (pure coincidence!!)


Began work on the costume almost immediately after seeing it, though it got put aside when I saw the first images of Ezio from Assassin's Creed II. When Ezio's done, I hope to return to this project.... someday...

Built the base from cardboard, with a hook to attach it to back armor.

For the plates, I used Sintra sheets, which i engraved, and kickstomped in the driveway to give it the beaten metal like the figure.

Used hot glue to add texture in the carved out holes, and cut the excess off so the plates would fit over it easily.

And some painting to see how they look so far :)

Friday, December 18, 2009

Assassins Creed 2- Ezio's belt

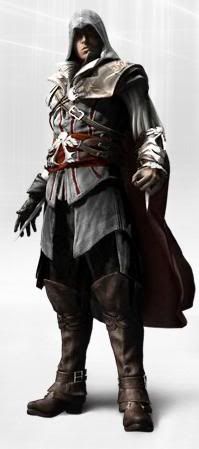
Been working on a personal project, full cosplay of Assassin's Creed 2, big fan :)


One of the tougher elements has been the belt.. its not only located in a spot that would mean breakage for the thing unless it was was made from metal, but the design itself just wouldn't work, because the posts on the buckle are facing the wrong way, and even if they were, they'd be a b*** to buckle.

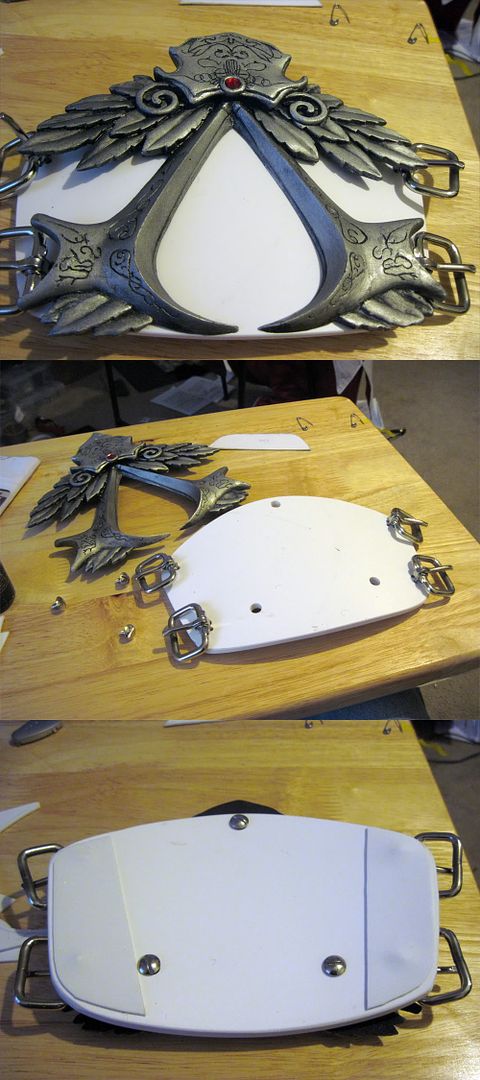
first of course, was layout.. Drew up the design and made a tagboard and plywood mockup to lay out the belt. Will sculpt the insignia onto the plywood.

Then began the sculpting. Used super sculpey. I don't remember how long it took because I wsa working on & off between projects.


I had sculpted and baked the insignia in sections, to help avoid fouling up areas that already sculpted.


 A lot of sanding was done to smooth out imperfections and such.


After a quick acylic paint test (and subsequent stripping of the paint, which proved tougher to do than i thought), I cast it in Moldmax 30, and poured a plaster support to keep it from losing shape when doing pours.


After brushing the inside of the mold with aluminum powder, I poured smoothcast 325 into the mold. Here's the result of the cast once it set.


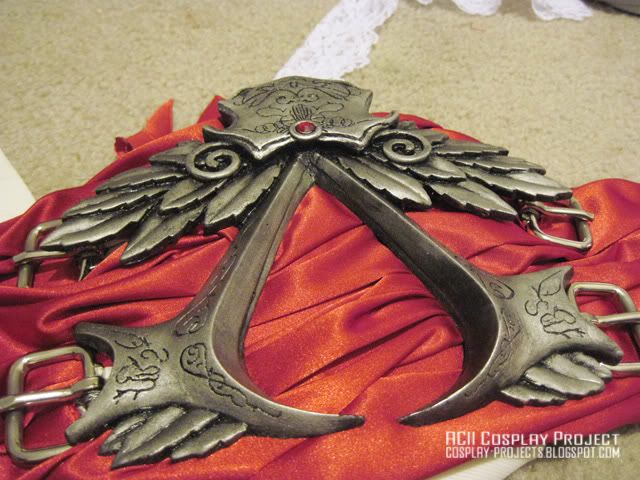
After sanding the reverse side of the cast to remove the flashing and even it out, I did a "wash" of sorts using spraypaint and a rag.


theres the finished components. Added bolts to the back of the insignia, to connect it to a backplate shaped by heating 2 layers of Sintra and gluing them together with an epoxy to add strength. It'll protect the insignia when ones bending, as well as provide a base to mount the buckles onto. I cut the roller bars off the buckles, and they're mounted to the plate using framing wire. Added padding so the wire won't jab the wearer in the stomach.

The sash is actually fabric wrapped over a piece of vinyl in the approximate shape i wanted. Bunched it up to look as close as i could get to the references. slots and holes were cut into it to add it onto the backplate. Added hook and loop onto the ends of the sash, to make it easier to put on. the seam will be covered by the sash that hangs off the side.


The insigna was then bolted onto the backplate :)
 

Time to cut out & test the belt straps! When done with those, the insignia will hold the partial pieces of leather in place., because Ubi didn't' make a design that would actually WORK and theres "magic" involved XD
 

Used the cardboard mockup as a pattern for the leatherwork. After hooking the sash around the waist, I buckle the straps in the -back-, since that setup back there actually -does- work  based on the references.
The AC logo in the back is purely decorative, since I'll be clipping pouches to the back of the belt once they're completed.
 

Since the insignia required a mold, I can make more  insignia assemblies if one might be interested. Belt n' sash not included.. Here's some info and a request form here

Other elements of cosplay gear (left bracer, daggers, paulron clips etc. ) will undergo similar treatment XD

Wednesday, September 30, 2009

Kingdom hearts- Axel's Chakrams

Disclaimer!! This was how I went about making these chakrams. It takes forever, and sucks to be honest! If you could find another way that would be better than doing it this way (unless you ENJOY spending a couple hundred hours sanding T_T )

I AM -NOT- TAKING COMMISSIONS FOR THESE. NEVER AGAIN. UGH.

 
 I was commissioned to make a pair of rather spikey chakrams based on Axel from Kingdom Hearts.

This is the third "take", as the first one was begin carved in wood, and took waaaay took long, and the second (in which i used this mold) I had casted in pure resin, and the chakrams weighed about 13 lb each and were brittle. Boring out the centers was also taking waaaay too long)


I sculpted 1/4 of one side of the Chakram to save on casting the cost of the mold rubber. In retrospect its a complete nightmare, and if I was to do this again, I'd sculpt and make a mold of one full side..

Heres how I went about making the mold a bit, Click for a larger view. 


1- laid out 1/8th of a chakram on matboard, used hot glue and shims to define facets

2- hotglued some insulation foam into place to use as filler so i wouldn't use up all mah bondo

3- slopped bondo on there, and used the shims to help guide tools to make facets even.. this is the result after lots of sanding

4- gold has a habit of making imperfections show, so thought i'd take advantage of it for once.. sprayed it with the gold, and did more cleanup.. figure that fizing it now would prevent having to fix it 16 times over later

5- glued part onto MDF, put lil putty around edges to keep silicone from getting underneath, then used hot glue and tagboard to build a box around it. seal up ALL crack lest it dribble out

6- used smoothon sorta-clear 40 silicone rubber on it after applying mold sealer and rubbing off excess (its waxy). crossed fingers that i did it right and waited 16 hours (attempt to save on rubber by adding a couple chunks of insulation foam failed, they floated to the top)
after it cured, this would have been a better time to add layer of plaster as a support!

7- pulled everything apart and viola! a big rubbery 1.8th of a chakram! woke up fiance by sneaking into bedroom and lobbing it on him

8-after pouring plaster support structure underneath, i thought I'd try adding some silver here. after spraying light coat of mold release, dusted on some silver aluminum powder that i got from pearl art supply. (think flouring a pan here) used can o' comlressed air to spray excess off.


I dusted the inside of the mold with aluminum powder.

I made the "shells" by laying down two layers of fiberglass. Once they cured and i popped them out of the mold, I laid them across a belt sander to remove the excess and flashing.

Filled the cavity with Great stuff foam, and let it set for a day

After cutting off some of the excess with an exacto knife, I again took to the belt sander and flattened it out

Added a flat sheet of fiberglass on top of 1/2 of the chakram segments.

After pairing off segments and gluing them together I assembled them into a full chakram.

Beginning main assembly.

One of the chakrams fully assembled. This needed a lot of sanding work done, as I made a bit of a mess when gluing them together (used fiberglass resin)

Once assembled, i began the long process of puttying up imperfections and sanding them smooth.

A WHOOOOOLE lot of puttying, sanding, and puttying again, and the segments are smooth enough to primer. Decided to primer areas that i finished sanding, to keep track of whats done and whats not...

There were still a bunch of lil' bubbles n' such, so I went back and sprayed the thing down with Kilz, its thick and cakey and fills in holes good. Laid a thin coat of gold so i can see what needs work easier.

a whole lotta sanding again, working down to 400 grit..

Laid down Krylon brilliant silver,

aaand time to paint it,

After wrapping the grip using the foam taken from a rake handle, one completed chakram! (repeat above for the other one T_T)