

 Posts
Posts


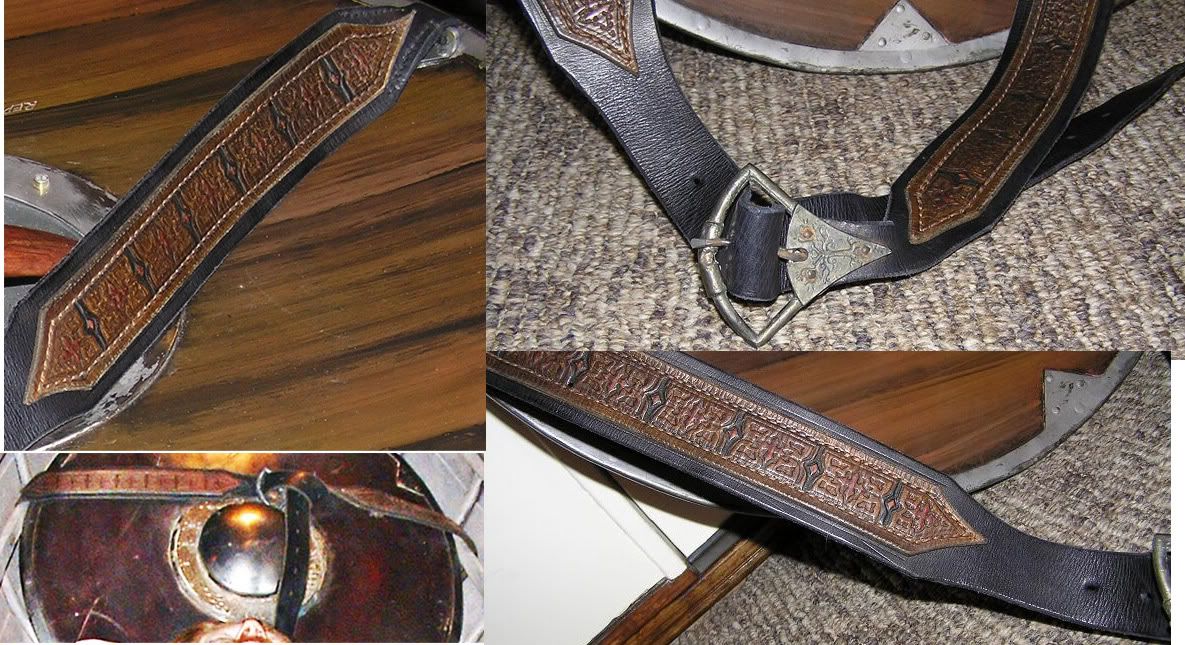
Here's some reference photos. Unfortunately, there weren't a lot of them to work from...
The first thing I did was make the stamps, since hand tooling the entire thing would be insane. I did the initial sculpt from Super sculpey, then poured resin into it. Since I didn't bake the sculpey, I was able to scrape it it out after the resin set relatively easily and used some paint thinner to clean the tighter crevacises. Though the stamping worked, I realised that I sculpted it in reverse of what i needed. Oops!
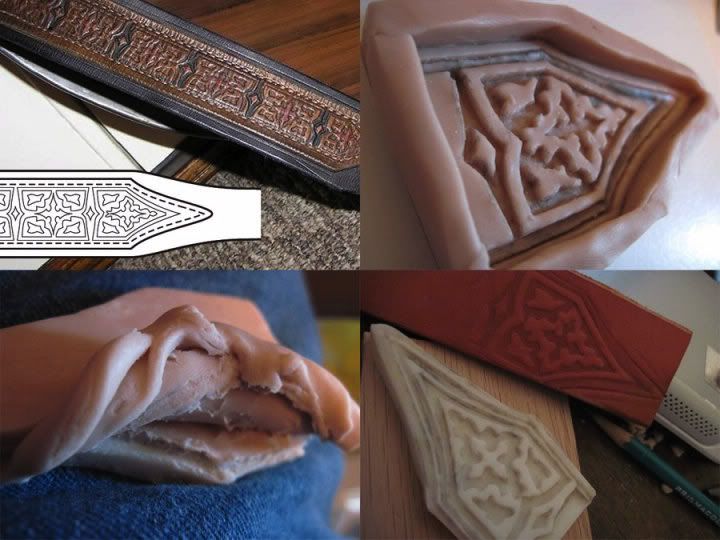
These are the ones I remade, and mounted them onto wood blocks to provide support. Did a test to make sure they were correct!

Laid the leather, wet, on a table, and used a C clamp to press them onto the leather, since they're too big to beat with a mallet, and i didn't want them to shift. The diamond ones were pressed harder than the others to emboss them deeper

Here's one of the straps, with the tooling finished, the edge was embossed with an overstitch wheel to use as a guide when punching the holes.

painting & dying the straps. First I laid down the black & red, then went over the whole thing with an antiquing gel. Those I got from Tandy leather factory the black straps were dyed with an alcohol based dye I tried out, which penetrated the leather nicely. A coat of black gel antique was added over that, and the straps were sprayed with a woter resistant spray.

The next phase was the pain in the... since I don't own a hand sewing machine they had to be sewn by hand. Since the leathers too thick to just sew through, I had to prepunch the holes with a diamond shaped punch, then use a set of pliers to pull the needles through. I recruited my fiance to help with some of the sewing. It took almost two days of solid work from both of us to get em done. Used a basic saddle stitch, which involves two needles. Here's my fiance toiling away!

Yay! The sewing on the straps are done, and our hands are sore!

The next step was adding the bluckles. Mike had welded together 3 of the lil' buggers and sent them to me to rivet. I did a lil' trimming of a couple, drilled holes, and riveted the straps from the underside after gluing them down. Mike's going to have plates engraved to cover the ones he did, since trimming them made them uneven. That'll cover up the holes I had accidently drilled too high as well ^^;

Aaand finished straps! I'll be seding these to Mike, and he'll be sewing them to the shield. Have fun with that Mike! (sarcasm!)


